Time to get Spook 👻 settled and installed in your Home Assistant instance.
Getting Spook up and running should not be too hard when you follow this guide. If you run into issues during the installation, please check the Support page on where to go for help.
1Requirements
Spook needs a few things to work properly, so let’s go over them first.
Read, understand, and accept the license of Spook.
A working Home Assistant instance running version 2025.2.0 or newer.
You have the Home Assistant Community Store (HACS) installed.
I don’t have HACS installed. How do I do that? 👈If you don’t have HACS installed yet, please follow the official installation guide.
If you have met these requirements, you are ready to install Spook. 🎉
2Installation
Time to download and install Spook 👻 onto your Home Assistant instance.
From the Home Assistant sidebar, select HACS. This will open the Home Assistant Community Store dashboard.
Select the search bar at the top of the dashboard and search for
Spook.Spook should now appear in the search results. Select it.
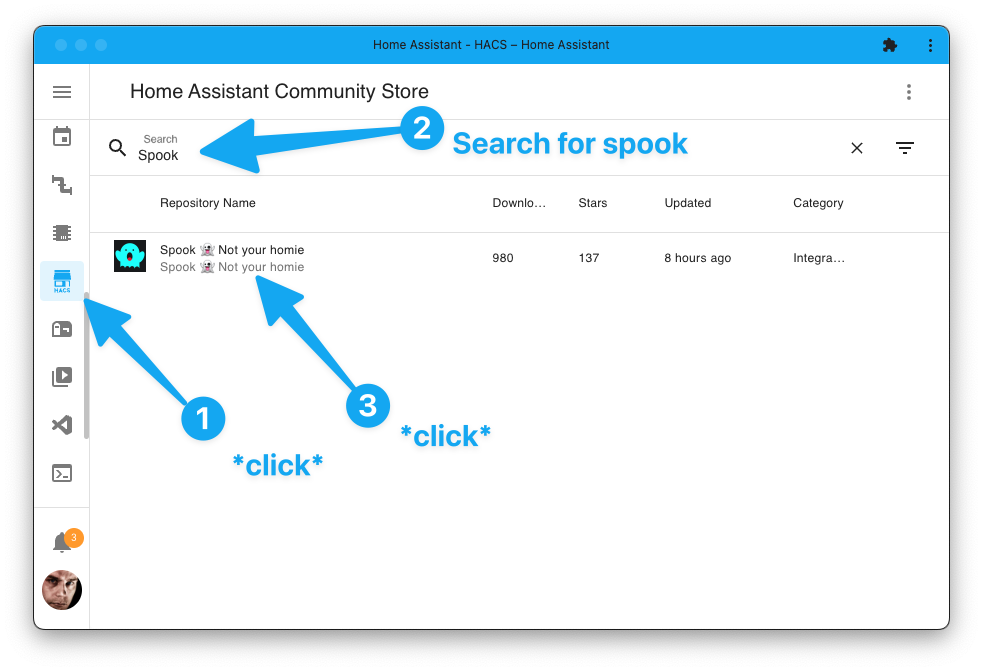
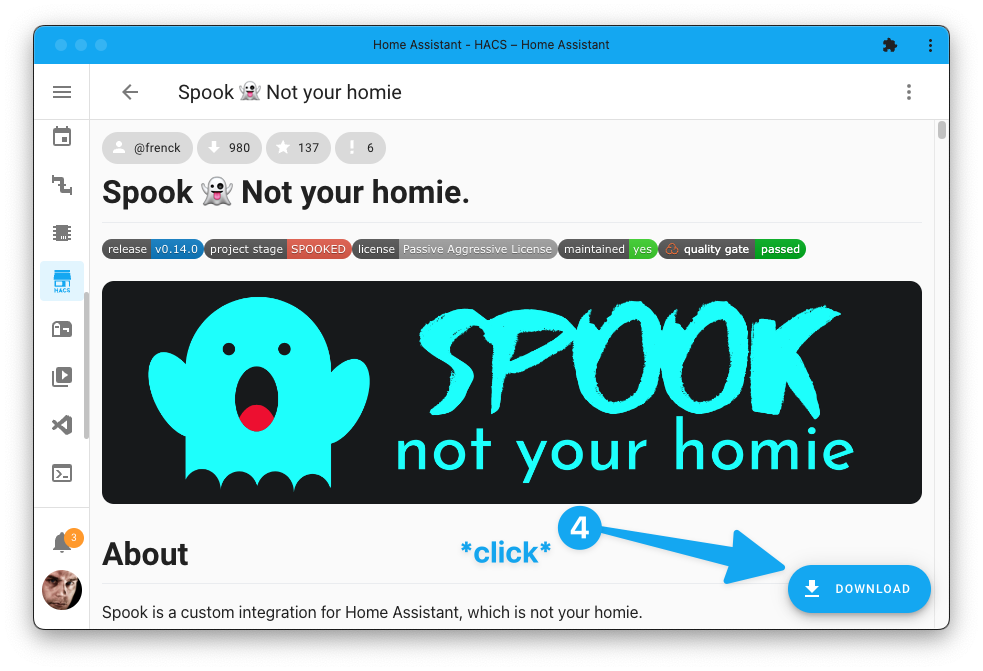
On the Spook page in HACS, select the Download button in the bottom right corner.
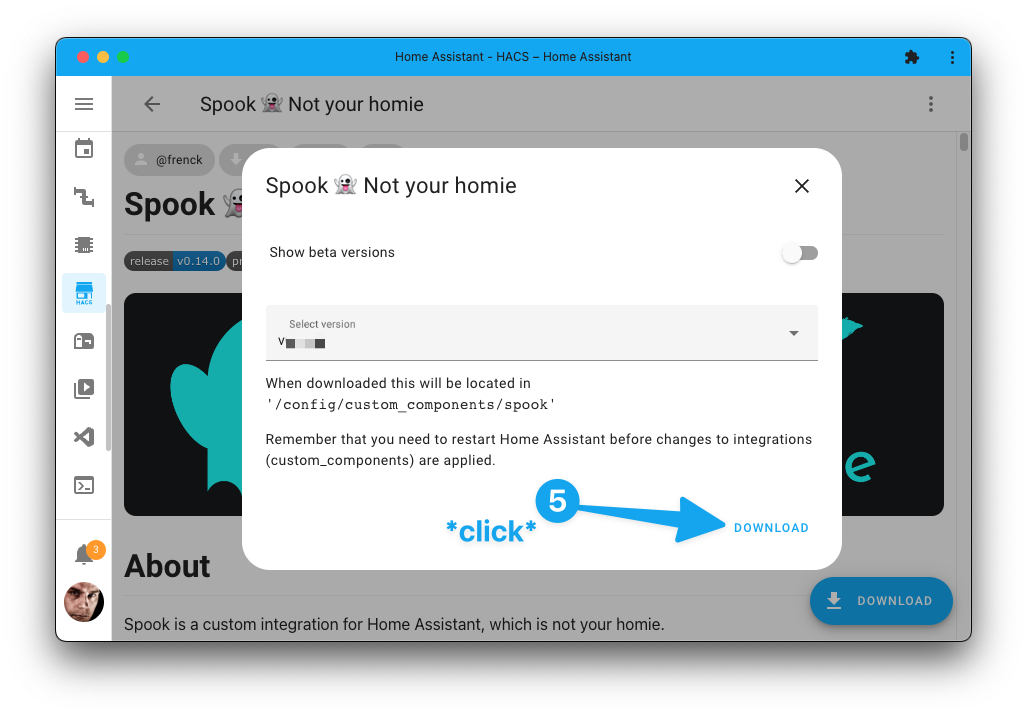
In the download dialog shown, select Download to download the Spook integration to your Home Assistant instance.
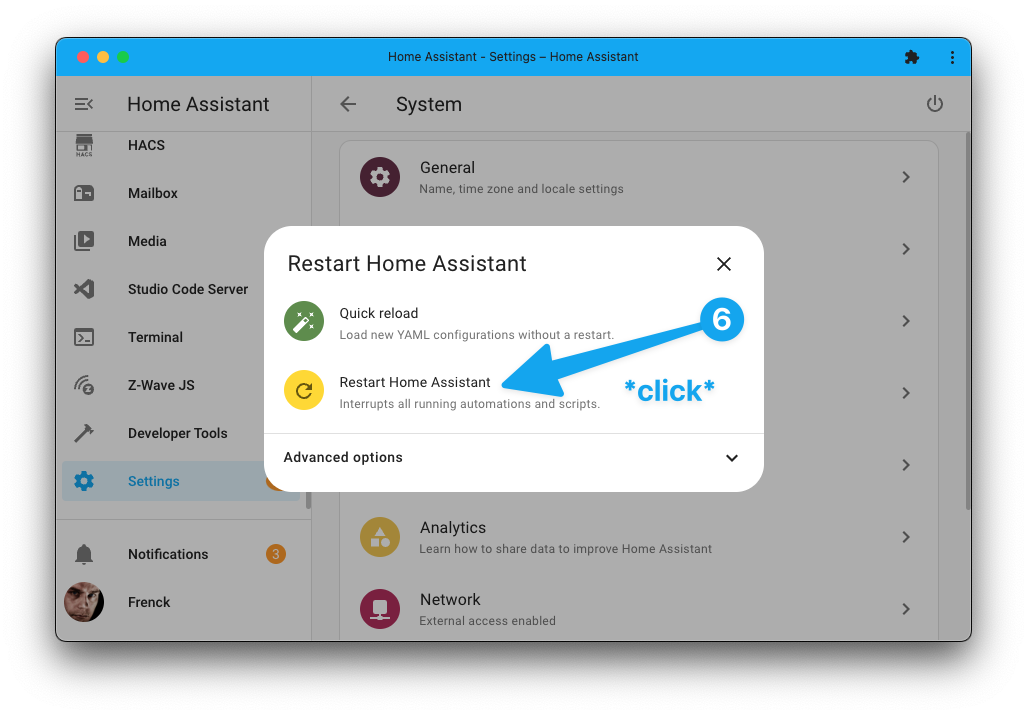
After the download process has been completed, you need to restart Home Assistant in order for Home Assistant to see the new Spook integration.
Select Settings from the sidebar, and then select System.
In the top right corner select the power button
Select Restart Home Assistant in the dialog that appears.
After Home Assistant has restarted, you are ready to activate the Spook integration.
3Activating the Spook integration
Now that Spook is installed, it is time to set up the integration in Home Assistant. This works exactly the as setting up any other integration in Home Assistant.
From the Home Assistant sidebar, select Settings and next select Devices & Services.
On the Devices & Services page, in the bottom right corner, select the + Add integration button.
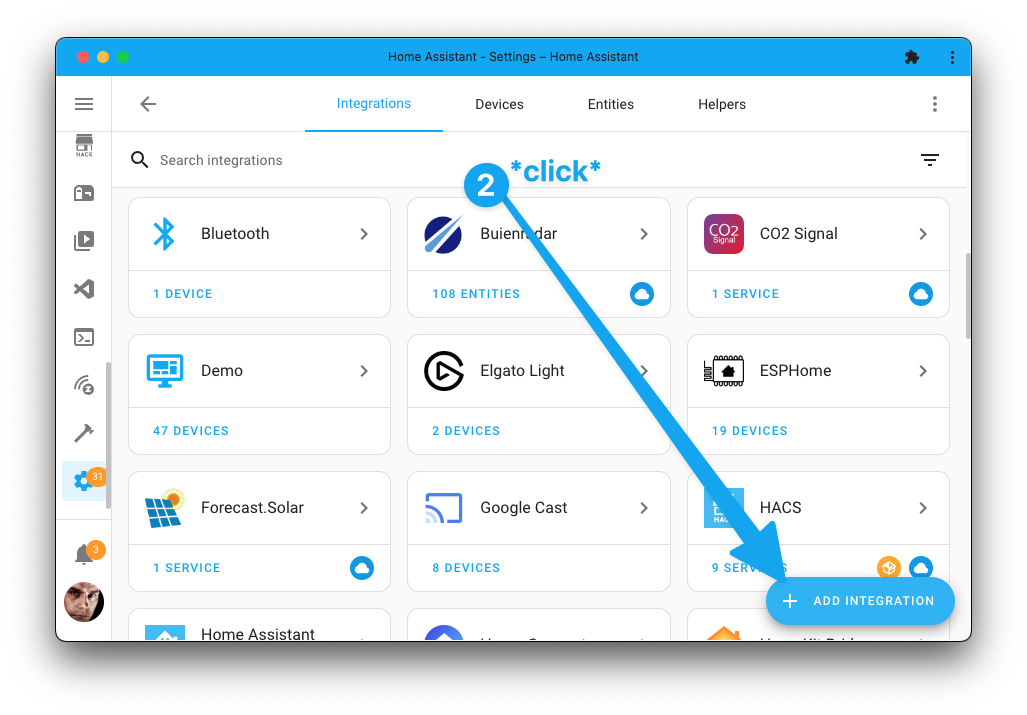
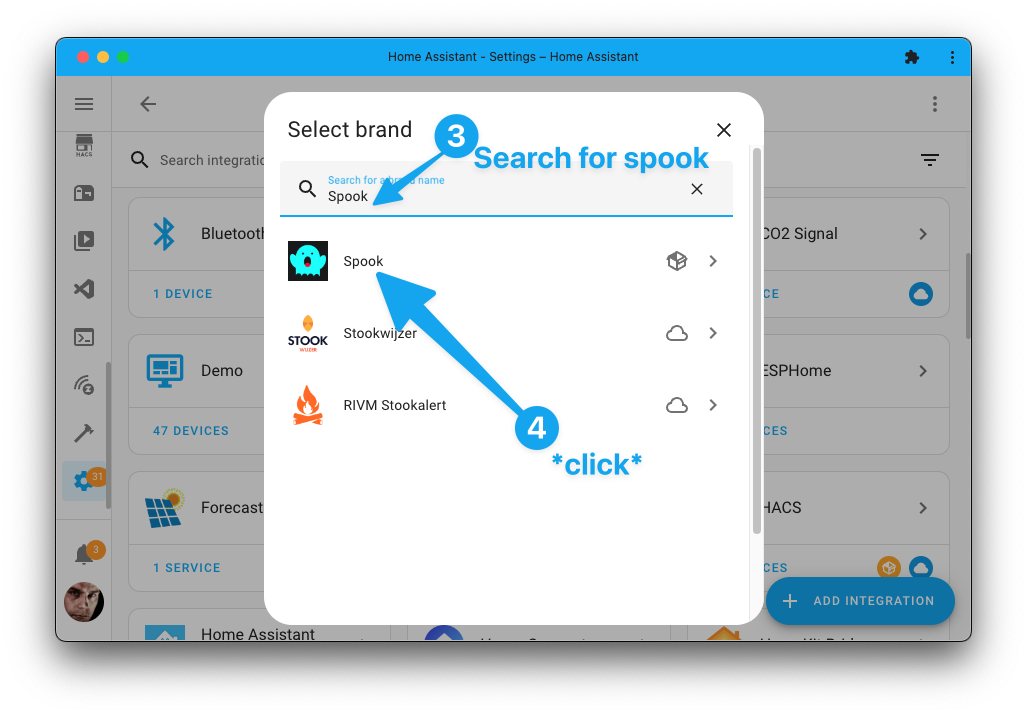
Select the search bar at the top of the dialog shown and search for
Spook.Spook should now appear in the search results. Select it.
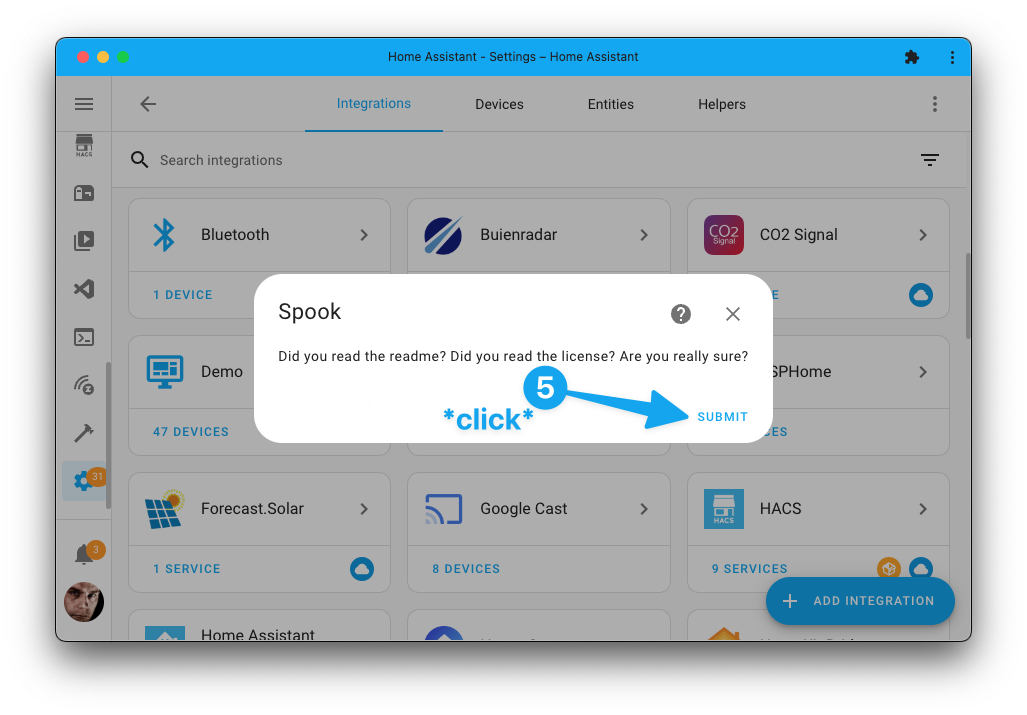
Confirm you have read, understood, and accepted the license. Then select Submit.
It now takes a few seconds for the Spook integration to be set up, after which a success dialog will appear. Select Finish to close the dialog.
🎉 You have successfully completed setting up Spook 👻 in Home Assistant. 🎉